
1.- Introduction.
Aunque este tutorial está destinado para aprender cómo fotografiar obras de arte en general, se ha escrito pensando en la fotografía de cuadros y pinturas, con el objetivo de conservarlas en formato digital y todo lo que ello conlleva, desde la exhibición en internet hasta la venta de reproducciones.2.- The camera
Para este tipo de fotografía no es indispensable un equipo de gama profesional. No son necesarios teleobjetivos, ni grandes angulares. La mayoría de cámaras digitales, incluso las que tienen dispositivos de telefonía móvil, nos sirven perfectamente. Es muy recomendable disponer de trípode o en su defecto de algún soporte o lugar donde depositar la cámara para no tener que sostenerla a la hora de realizar el disparo. Hay que tener en cuenta que algunos dispositivos pueden carecer de flash, zoom o algún que otro elemento.3.- Lighting
La iluminación es probablemente el punto más importante y difícil de manejar. Necesitamos un espacio bien iluminado, con luz homogénea, difusa y de una sola tonalidad. Es necesario evitar lugares con varias fuentes de luz de distintos tonos porque alterarían el color de la obra a fotografiar. Además, la obra tendrá que situarse delante de un fondo neutro, sin colores (gris, negro o blanco).4.- Preliminary preparations
4.1.- Iluminación artificialThe more light the better, as long as it's even and diffuse. Artificial light is easier to control, but you can also use natural light provided you take the photograph in a very bright interior space and not outdoors. If you're going to use artificial light, it's a good idea to light the artwork from both sides to avoid glare and reflections, making sure the light doesn't hit the artwork directly.
If there isn't much light, we can use the camera flash (although the flash is usually very strong and creates glare and very harsh contrasts). If you do use the flash, a trick to diffuse and soften it is to cover it with one or several sheets of translucent white paper (a paper napkin would do the job).
Another studio trick is to bounce the light off a white surface (walls, boards, umbrellas...) so that it reaches the artwork at a 45 degree angle. If you use the flash, try to lower the exposure time so that the flash is really effective at evening out the lighting.
4.2.- Position and framing
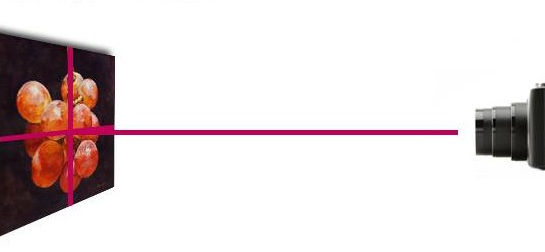
To take the shot, we'll place the camera in front of the artwork, parallel to it and at the same height. The distance to shoot from is whichever gives you good framing and lets the artwork fill almost the whole photograph. If your camera specifies the focal length in some way, it's advisable to shoot at 50mm to avoid distortions and deformations of the artwork.
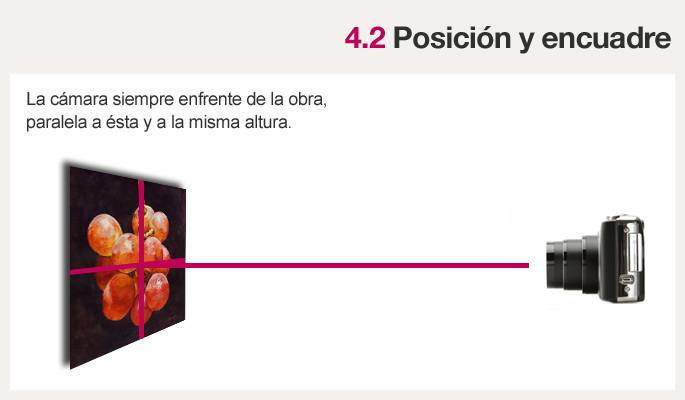
If your camera has an indicator in 'mm' it will be very easy to set the focal length to 50mm. If it doesn't, you can work out the focal length with some very simple calculations. Normally all cameras specify their minimum focal length, which may be 35mm (the usual focal length on mobile phones). In this particular case, if we set the zoom to x1.4 we'd get a focal length of 49mm (35mm * 1.4 zoom), which would do the job since it's almost 50mm. (If a user with a "normal" digital SLR sets their camera's focal length to 50mm, they will actually be using an 80mm focal length in analogue format, depending on the conversion factor.)
If you can't work out what focal length you have, here's our advice: if your camera has optical zoom, set it to halfway through its range, which is where it works best. If, on the other hand, the zoom is digital, leave it at the minimum.
4.3.- Shooting settings
Even if your camera allows manual settings, you can also try the automatic ones, since they often give better results. Your camera's user guide will probably specify which automatic preset works best for each type of photograph.
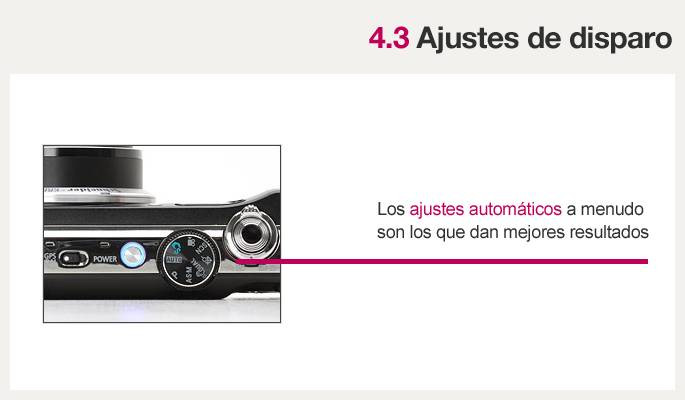
If our camera has a delayed shutter and we have a tripod or somewhere to rest it, we'll use the delayed shutter, which lets us avoid what in photography is called camera shake. That way we won't move the camera and the photograph will come out sharper, since we won't be involved in taking the shot.
Whether we use automatic or manual settings, we have to bear in mind that these settings are mainly meant for taking a static photograph and that, therefore, we don't need a fast exposure. This means we can set whichever aperture values suit us best and go, in this case, for a middle aperture (of whichever camera we're using), which is usually the best one to work with. An aperture of F8, for example, can be perfect for this kind of photograph.
Keep in mind that if we use very large apertures we could end up with some part of the photograph out of focus. And if we use very small apertures, the long exposure time could cause noise in the image or highlight differences in lighting across the artwork.
4.4.- File format:
It's important to set up the camera so that we save the photograph at the highest possible quality. The vast majority of digital cameras allow you to record in JPEG at various qualities: choose the highest quality and largest size.
Some cameras offer their own RAW formats, which allow you to fine-tune the result better, but for this tutorial we're assuming that format is for more advanced users.
5.- After the shot
Lo más probable es que la fotografía no salga bien la primera vez debido un conjunto de factores que analizamos a continuación:5.1.- Image too dark or too light
In automatic mode the image shouldn't come out either too dark or too light unless we've disabled the flash. In that case, we should enable it again.
If we've taken the shot with manual settings, the image will come out dark if the exposure time is too low or if the aperture is too small (you have to change one of the two parameters, or both, to solve the problem). The image will come out too light if the exposure time or the aperture are too high.
5.2.- Glare and reflections
If the artwork is covered in varnish or behind glass, it's very likely that the lights, the flash or other elements will show up reflected in the photograph. You need to cover the lights with white gauze or translucent paper, or change the camera's position a little, to avoid that glare.
There are polarising filters on the market (not excessively expensive) that can remove those reflections, but you'll only be able to use them if your camera lens is threaded for them.
5.3.- Distorted image.
The image can come out distorted for two reasons: because you're not working with the right focal length (to solve the problem, try zooming in or out) or because the camera isn't correctly positioned in front of the artwork being photographed.
5.4.- Wrong colours.
If the photograph has the wrong colours it can be down to two reasons:
-The photograph was taken under incandescent bulbs: the result is that the whites come out yellowish. To solve this problem you need to do a "white balance", a procedure we'll deal with in point 6.
-A lighting problem: when the colours in the photograph differ from one part of the photograph to another. This is because the artwork hasn't received the same light across all of it. Make sure the artwork receives a single light of one same tone. If it isn't possible to get rid of those lights, use only the flash.
6.- White balance
Cuando se toma una fotografía, el resultado está claramente condicionado por la iluminación que recibe. No es lo mismo tomar una fotografía con el sol en lo alto, en un día nublado, en un interior o con una lámpara incandescente.If we photograph a piece of white card under these three lighting conditions, the result is that each photograph will come out with a different shade of white (in one the white will be bluer, in another yellower, and so on).
These shifts in tone can be corrected with the "white balance". Many cameras do it automatically and, if that doesn't work, you can always do it manually. Most cameras allow a "semi-automatic" adjustment that can do the job, that is, they offer the option of detecting the balance automatically or of you specifying whether the photograph is being taken in sunlight, under fluorescent light, with an incandescent lamp, etc., which in most cases will be enough.
More advanced users can handle the colour temperature directly, which lets them adjust the tone to be corrected degree by degree. There's also the option of shooting in the camera's RAW format, if it has one, which saves the data uninterpreted and allows you to apply different white balance settings afterwards.
A common trick for correcting or adjusting the white balance is to place a piece of white card next to the artwork being photographed, so that the card appears in the photograph. Many editing programs can use that reference to work out the ideal white balance.
7.- Final steps
Una vez hemos realizado la fotografía hay que tener en cuenta que siempre queda pendiente una parte deprocesado digital. Puesto que estamos fotografiando una obra real para intentar reproducirla lo más fielmente posible, los pasos de procesado que llevaremos a cabo no serán como los que se usan en otros campos.7.1.- Focus and sharpness
Most image editing programs (such as Photoshop) let you adjust and improve the focus and sharpness of a shot. If the result isn't clearly sharp, we could use these programs to improve focus and sharpness, although it's best not to overdo it.
7.2.- Colour and levels correction
Colour and levels correction can alter how faithful the result is, but most programs have automatic settings you can try out. Sometimes they can make the image truer to the original.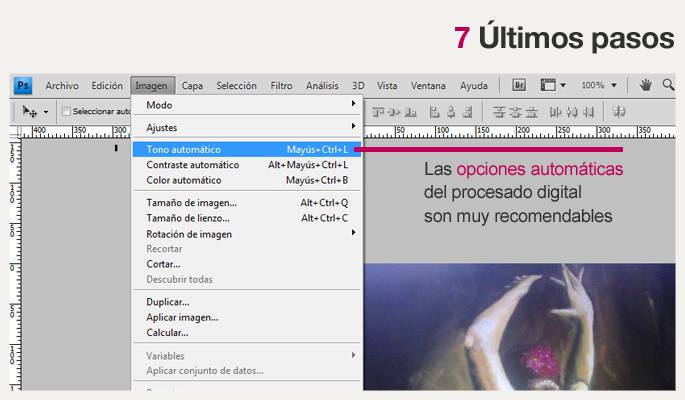
7.3.- Cropping
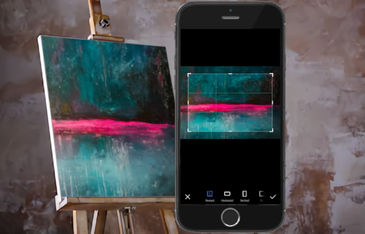
When you take the photograph, the picture or artwork usually doesn't fit perfectly in the image, and it may even have a frame that we don't want to appear in the photograph. That's why we need to crop the image so that only the picture or painting shows.
7.4.- Saving the result
The resulting image has to be saved as a JPEG file. There are a couple of important things to bear in mind: JPEGs lose quality, so it's important not to save the image over itself, but as a new file. Also, if you always work on the original and save it as another file, quality losses won't pile up. If, on the other hand, you always open and save the same file, it will lose quality every time it's saved.
The JPEG format lets you choose the quality. Save it at the highest quality possible.
At Artelista, in collaboration with Hewlett-Packard, we make prints from images of 2125x1417 pixels (equivalent to 3 MegaPixels).
8.- Glossary
Tiempo de exposición: es el tiempo que transcurre durante la captura de la imagen. Cuanto mayor es este tiempo, más posibilidades existen de que cualquier movimiento haga más borrosa la captura de la imagen y menos efecto tiene el flash.Aperture: measured in F. The lower the F, the larger the aperture. It refers to the size of the opening the image comes in through. A larger aperture lowers the exposure time and lets in more light. A larger aperture also makes the area in focus smaller.
White balance: a mechanism for removing the tonality of the light when it isn't white.
Focal length: the distance between the camera lens and the sensor that captures the image. By changing the focal length you take in more or less space (zoom), although that space is distorted. The 50mm focal length is the one the human eye has.


Comments (12)
Detectives 360º
November 9, 2022Lourdes
December 1, 2021Manuel .
September 30, 2021tasacion de obras de arte
October 1, 2020Nils
December 16, 2019María
January 1, 2017Soy artista visual principalmente pinto en acuarela ,mis imagenes son bastantes sutiles.Me gustarían que me indicaran la mejor manera de fotografiar acuarelas tenues sin y con vidrio en espacios de interior principalmente con poca luz y en murallas de color café claro ocupando cámara compacta marca Canon con sum de 25.
Muchas Gracias.
Ricardo Lapin
May 20, 2016Ricardo Lapin
May 20, 2016Fernando
July 20, 2015Me gustaría fotografiarlas decentemente pero no hay manera, no encuentro luz que me convenza y no dispongo de flash. ¿Cómo veis sacar los cuadros al aire libre para fotografiarlos? Creo que al ser la luz natural tienen que salir bastante bien pero no se.
¿Ayudaría hacerlas un día nublado para que la luz sea más difusa?
Un saludo y gracias
Enrique
August 10, 2017Saludos
Alfredo Rodriguez
February 7, 2014Log in to leave your comment. Log in